Wednesday, May 16, 2012

The Big 4-0!!!

Well, it is official my hubby and I are getting old.  We just celebrated my husbands 40th birthday, CRAZY!!!  I created this card from the Cricut Life's A Party Cartridge.  The paper is Coordinations, I bought it in the open stock at JoAnn's.  I used the Cuttlebug embossing folder Traffic Jam on the grey background and then added some silver stickles to spice it up a bit.  I don't know if vultures are suppose to be spicy or not??? :) And finally added some black twine!!!

I made a birthday basket for my hubby this year.  "The Big 40" was also off of the Life's a Party Cartridge.  I just used the fit to page feature on my Cricut Expression (I think it turned out to be 11 1/2") to cut out the phrase.  I ended up gluing it to a wooden shim (the only thing I could find at the moment) so it would stick out of the basket.  
SIDE NOTE:  My two year old decided that he could be a big help during this project :/, so instead of taking his nap he was helping glue, tape and cut just about anything he could get his hands on and endlessly repeating "but, what about me???".  
So, in the end a wooden shim didn't sound so bad!!! :)  Anybody else have crafting days like these?

Tuesday, May 15, 2012

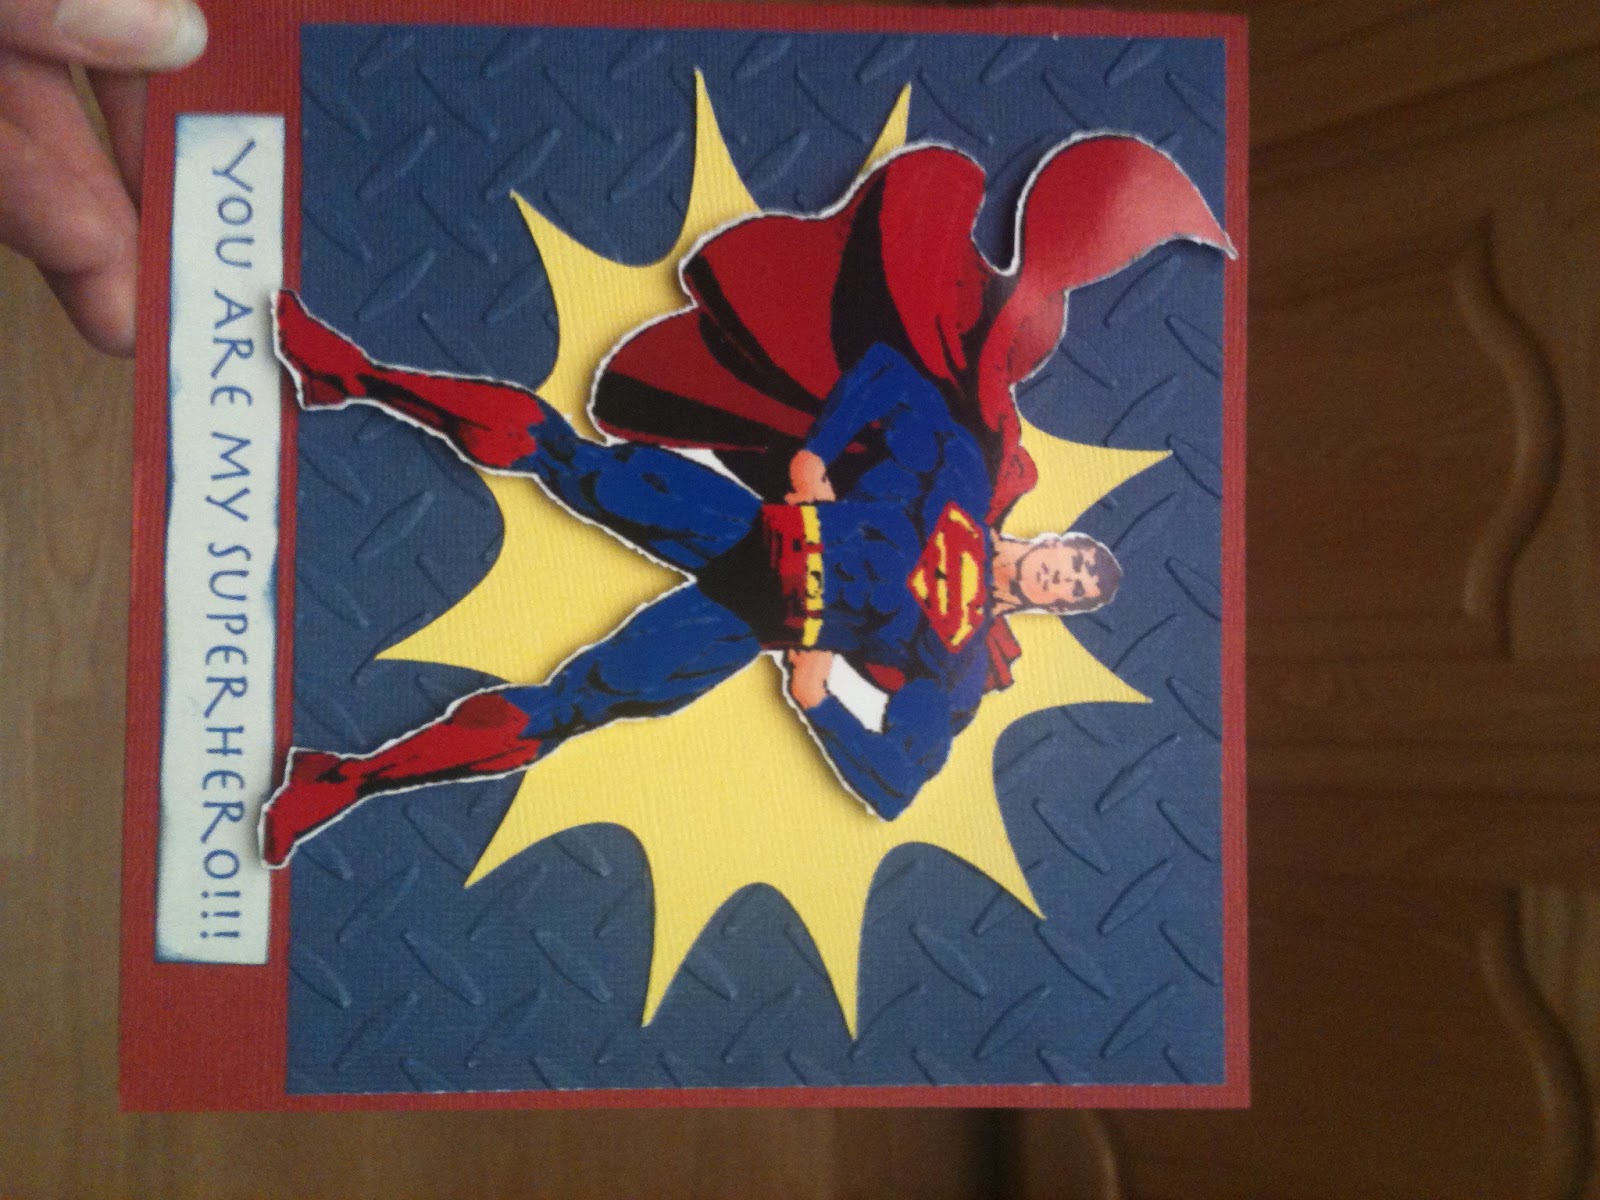
You Are My Super Hero!!!

Made this card for my hubby for our anniversary!!!  I got the idea from the Obsessed with Scrapbooking blog.  Since I didn't have the Cricut Superman Cartridge at the time, I just got online and looked for free superman graphics.

I used the print and cut feature on my Silhouette to cut out Superman.  The cut itself is a little ragged.  I tried to adjust the cut lines through the Silhouette Studio software, but that was WAY more than I was bargaining for and stopped.  The hubby didn't seem to notice :), or was to kind to mention it!!!
I embossed the blue background with the Cuttlebug diamond folder, and the yellow burst in the background is from the Cricut Best of Pixar Cartridge!!!

Sunday, May 13, 2012

Missing you a TON!!!

This cute elephant is from Treasure Box Designs.  Isn't it the cutest!!!  I wanted to enter the weekly color challenge at I came, I saw, I created so I used my Silhouette Design Studio to alter the colors a bit.  The ears of the elephant are Pink Pirouette, the body is Sahara Sand, and the peanut is Always Artichoke!!!  I also incorporated yellow, green and coral (orange) into my project so that it qualified for the Cameo Creations Challenge.  The tulip cuts are free SVG files from SVG Cuts, and the grass was a free SVG file from Little Scraps of Heaven.  I used Glossy Accents on the eyes to give them the shiny, wet look and the Cuttlebug Mosaic embossing folder on the peanut to add texture.

I was WAY excited to see that I could alter the colors on this SVG file, I just went to the fill screen and chose advanced options (at the bottom) and from there it let me enter my own RGB codes.  I printed it out on white textured card stock and then used my print and cut feature to cut out the shapes on my Silhouette. The white cloud at the top is from the Cricut Cartridge Paper Dolls for Everyday.

Monday, May 7, 2012

Happy Mother's Day!!!

I love watching Monica's tutorials for the Silhouette and decided to enter one of her challenges.  So here it goes for Cameo Creations #7.  The challenge was to create a Mother's Day Project and use ribbon.  Here it is.....
 The gift card holder is from the Silhouette online store and was created by Lori Whitlock.  I cut out the gift bag on my Silhouette SD (I am still dreaming of the Cameo)! I used some glitter paper from a DCWV pack (bought too long ago to remember which one) :).  The flower is from the Cricut Flower Shoppe cartridge (Fantabulous Cricut), it is the daisy pattern and was cut at 1.55 inches.  The cute sentiment is from the My Creative Time This and That stamp set.
Of course I am not giving my mother an expired Kohl's coupon for Mother's Day ;), it was just the first thing I could find that was the right size to try it out!!!  Her store of choice is Hallmark, so that is where the gift card will be from!!!

Saturday, May 5, 2012

You Light Up My Life!!!

I made another goodie bag!  I love these because they are so quick to make and easy to drop off to a friend or family member.
I decided to enter my first challenge and used the color scheme off of the I came, I saw, I created blog, which is Pumpkin Pie, Pacific Point and Real Red.  I didn't have Pacific Point and Real Red on hand so I used my Cricut Imagine to create those colors.  I thought the blue turned out okay, but I wasn't thrilled with the red.  I cut the Real Red out using the stock shapes 1:2 at 5.7 and Pacific Point using stock shapes 5:7 at 2.9.  I did have to cut both of them down a little bit more. The sun was cut from Pumpkin Pie Cardstock at 3.35" on my Gypsy so that I could hide the face and use my cute Peachy Keen Basic Paper Doll  1 3/8" Stamp. The sun is found on the Cricut Creat a Critter cartridge, and is part of the Simply Crafts Challenge.  The embossing on the blue was the Sizzix folder stars and swirls.  I used my Sakura gel pens to add color and dimension to the stamp! Tada (as my two year old would say :)).

Tuesday, May 1, 2012

Goodie Bags!!!

Wanted to stop  by a few friends houses and let them know that I am thinking of them, so I made Goody Bags!!!
I got this cute idea from My Pink Stamper.  I bought my clear bags at Michael's, I believe they are 4 x 6, and you get 50 for $3 or $4, plus don't forget to use your 40% off coupon. :)

 I downloaded the cute bugs from kristidailey.com, they are the Bugs Color Graphics, and cut them out with the print and cut feature on my Silhouette.
 Last but not least I cut a piece of paper at 41/2 x 6, folded it in half, and stapled it to the top of my bag.  Then I cut another piece of paper at 4 1/4 x 2 3/4 ran it through my Cuttlebug using my Bloom Dot embossing folder, and glued it to the top of my base paper.  I then added my graphics with Pop dots and added a saying as well!

Saturday, April 28, 2012

Burp Cloths

 I know you have to stand on your head to see these burp cloths but I could't get a decent picture straight up and down...sorry!!!  Made these using the same method as The Odyssey Quilt, Heat-n-Bond.  The cloth is a Gerber fabric diaper, they make great, super absorbent burp cloths.  The brown at the bottom of each burp cloth is Wrights Extra Wide Double Fold Bias Tape.  I used my fun stitches on the sewing machine to sew these onto the unfinished edges of the diaper (i.e. flowers, hearts, loop-de-loop, wave).
The turtle, my favorite, was used from a free SVG file from SVG Cuts and was cut on my Silhouette.  The crown is from Cricut Paper Doll Dress Up, the princess and the whale are from the Silhouette store, and the dog from Cricut Paper Dolls for Everyday.  I used my Imaginisce I-Rock tool to apply bling to the crown, princess and dog.

*Word to the wise:  Wash the diapers and the material BEFORE you cut and bond !

Wednesday, April 25, 2012

The Odyssey

So my daughter, who is a freshman, has a project for her English class, as parents don't we all LOVE those projects!  I don't know about you but my child always seems to forget about them until just a few days before they are due, or tries to tell me that her teacher just gave her the assignment...yah right!!!

Anyway, this is what our collaborative minds came up with.  This is a rag quilt using just plain broadcloth cotton for both the squares and the cut outs each square was cut out at 4 inches.  We used both my Cricut and Silhouette to cut out the images.  The plant (lotus), mermaid (sirens), crown, and arrow were from the Cricut Paper Doll Dress Up Cartridge.  The monster (cyclops), ghost and sea monter were from the Silhouette store.  The cow was from Cricut Create a Critter Cartridge and The Odyssey was made from the Cricut Base Camp Font Cartridge.  I used my Gypsy to weld Odyssey together.

We used No-Sew Heat-n-Bond to attach the cut outs to the squares.  It is very easy you just iron it onto the back of your square before you cut out your design on your Cricut or Silhouette and then after you have cut it out you place it on your fabric right side up and iron again...Wallah!!!

Monday, April 23, 2012

Go Cowboys!!!


Made a fleece blanket for my boy, a HUGE Cowboys fan.  Used 2 yards of each fabric, the front is the Cowboys pattern and the blank a plain gray.  I lined up the two pieces and used clothes pins to keep the sides together as I cut!!!  I cut out a square at each corner measuring 4 inches and then cut up 4 inches every inch.  After completing that I tied the two blankets together.  Easy peasy!!!

Thursday, April 19, 2012

Just Keep Swimming!!!

I made this card for a friend that is enduring chemotherapy for breast cancer.  A member of our church gave a talk to our congregation a while ago that has always stuck with me.  She talked about how sometimes when we are in thick of trials in our lives the only thing we can do is...just keep swimming!

This card was made using the Cricut Cartridge Best of Pixar.  I was inspired by two blogs I follow, Glora's Crafts and Pretty Paper, Pretty Ribbons.  Glora's blog helped me to add dimension to my Nemo with my Sakura Pens, and Pretty Paper, Pretty Ribbons helped me to create the background.  I also used my Cuttlebug to emboss the blue paper using the Sizzix embossing folder Bubbles.  I used Glossy Accents to make some of my bubbles appear water like, and foam adhesive squares to give Nemo a 3D effect.