I have been told that it is best to store your Stickles upside down, and I didn't like how mine were currently being stored so as I surfed the internet I found some great ideas and decided to try something of my own. I already store my Cricut Cartridges in a similar way so I didn't think it would be too difficult to improvise.
I went to my local craft store and bought a Sterilite flop-top Clear CD Holder. It measures 7 5/8 x 6 1/2 x 4 1/2. I also bought 1 sheet of plastic mesh. Mine measured 10.5 x 13.5 inches. I cut four pieces of mesh at 40 x 14 and cut every 6 squares up 5 squares. I then cut five pieces of mesh at 35 x 14 and cut every 6 squares up 9 squares. If you are careful you can get all of these pieces out of one sheet of the plastic mesh.
Here is how I was able to cut all the pieces above using one piece of plastic mesh:
Showing posts with label Organization. Show all posts
Friday, June 28, 2013
Friday, July 13, 2012
Stamp Pad Organization
So here is how I have organized my Stampin' Up stamp pads.
I found this idea online, I will create a link at the bottom of this post to send you to the instructions if you are interested. This is made of foam poster board if you can believe it and is really quite sturdy. I have it in the window sill above my craft table and LOVE it!!! Everything is just within reach. I have my stamp pads organized according to color family and then have my other stamp pads along the right side. They will probably have to move to the bottom at some point because I would love to get the Stampin' Up In Color pads in the future. On the top I have my Ink Refills as well as my Ink dots and stamp cleaning pad. This project is time consuming and kinda tough so be prepared if you want to do it!!! Mine turned out all right, but I am somewhat of a perfectionist and it didn't go together perfectly, everything was fine until I tried to put the sides on. Have Fun!!!
Here is the website: Syzygy Of Me
If you are interested she also has instructions on how to make foam board Copic Storage :)
Thursday, July 12, 2012
Ink Dots!!!
So here is my way of saving a little extra cash when
I ordered my Stampin' Up supplies.
I already knew that I wanted to get the ink pads in the Brights, Subtles, Regals and Neutrals. I also knew that I wanted to get the ink refills that coordinate with each of the above groups. I really, really wanted the ink spots that go along with each of these too,but by now my money is getting tight, so this was my solution. I ordered this cute dauber box from scrapjazz.com and downloaded the corresponding chart from the same site. It glues right in the top of the lid. Then I ordered my extra daubers from Stampin' Up which truly was the best deal I could find. Last but not least I labeled each of the spaces in the chart with name of the ink in which I will use it with. It works out perfect. 10 slots for Brights, 10 for Subtles, 10 for Regals, and 8 for Neutrals (I also have craft white), with one to spare. I love these little daubers, they give you much more flexibility than the big ink pad does.
The box was $8 something and a package of 12 daubers (I had a few laying around) was $10.95.
I ended up saving myself about $36.
Just click on the links above to check out either item!!!
I don't know if any of you are like me...but the handwriting on the ink dot chart was driving me crazy, I like things typed, but because it was a pdf file I couldn't type in the color names. So...my husband helped me to create a table in Word.
Here is how to create one of your own.
*Create a table 8 x 5
*Highlight the table and Right Click
*Go to Table Properties
*Click Table Tab
Preferred Width: 7.25"
*Click Row Tab
Specifiy Height: .88"
*Click Colum Tab
Preferred Width: .88"
*Cell Tab
Center
*Highlight Table and Click Center Text
I used the Hobo font at size 11
*Start typing :)
I also put a dot of color on each of the color names, I am a visual person and it helps me to locate the ink dot faster!
I don't know how to put this on my webpage so others can download it, but if you want a chart pre- made with the Stampin' Up colors already filled in leave me a comment with your e-mail address and I will send it to you in an attachment!
I don't know if any of you are like me...but the handwriting on the ink dot chart was driving me crazy, I like things typed, but because it was a pdf file I couldn't type in the color names. So...my husband helped me to create a table in Word.
Here is how to create one of your own.
*Create a table 8 x 5
*Highlight the table and Right Click
*Go to Table Properties
*Click Table Tab
Preferred Width: 7.25"
*Click Row Tab
Specifiy Height: .88"
*Click Colum Tab
Preferred Width: .88"
*Cell Tab
Center
*Highlight Table and Click Center Text
I used the Hobo font at size 11
*Start typing :)
I also put a dot of color on each of the color names, I am a visual person and it helps me to locate the ink dot faster!
I don't know how to put this on my webpage so others can download it, but if you want a chart pre- made with the Stampin' Up colors already filled in leave me a comment with your e-mail address and I will send it to you in an attachment!
Friday, June 29, 2012
Stamp Organization!
I bought some new stamps with my birthday money and thought I would show you how I organize my stamps.
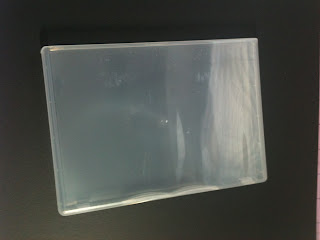
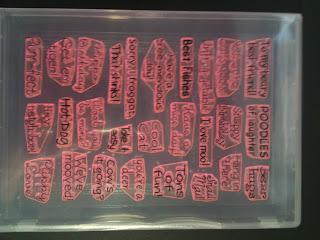
I use the Clear Mount Stamp Cases from Stampin' Up.
Here is a picture of one below.
Then I remove all of the stamps from there backing
and place them inside the stamp case.
I put adhesive on each side of the front sheet from the stickers with my ATG gun and center it in the front sleeve of the stamp case.
I then realign my stamps (as needed) so that they match up with the
front sheet which is labeled.
Next, I make a label with my label maker
to put on the spine of the stamp case.
And last I put it in my drawer with my other stamps!!!
I liked this solution because I don't have a lot of counter space in my craft area and could never use a clip it up or other similar item. Hope you like it.
If you are interested in the stamp cases stay in touch I will soon have a Stampin' Up website where you can order them! :) They are 4/$5.95.
Subscribe to:
Posts (Atom)